Learning CSS Part One
Picking up from the last entry in the HTML series, this post will jump into Cascading Style Sheets (CSS). Imagine the process of constructing a house. In this analogy, HTML serves as the building’s structure — the walls, the foundation, and the framework that provide a functional shelter. HTML, much like the blueprint of a house, defines the essential structure of a webpage, outlining its content, headings, paragraphs, and images. Just as the blueprint dictates the layout of rooms in a house, HTML determines the layout and content structure of a webpage.
CSS is the interior designer of the digital world. Think of it as the artisan who paints the walls with exquisite colors, arranges the furniture in an aesthetically pleasing manner, and adds the finishing touches that make the house a welcoming and visually stunning place to live.
In our digital house, CSS is the magic wand that adorns the HTML structure with style, elegance, and personality. Just as the interior designer selects the perfect furnishings and decor to suit the house’s purpose and the owner’s taste, CSS defines the fonts, colors, and layout of a webpage to convey its purpose and captivate its audience.
Applying CSS to HTML
There are three functionally equivalent ways to apply CSS to HTML.
Inline CSS
Inline CSS refers to the practice of placing styling information directly on an HTML element:
<p style="color: red;">This is a red paragraph.</p>
Generally, it’s best practice to keep styling information outside of the HTML documents. It’s handy to execute a quick isolated test.
Internal CSS
Internal CSS refers to the practice of including styling information within the style tags in the head element:
<head>
    <style>
        p {
            font-size: 16px;
            color: red;
        }
    </style>
</head>
Internal styling is fine for single-page websites or prototyping. When styling information gets too big, it can make a page a little unwieldy to read for a developer which brings us to external styling.
External CSS
By far, the most common way to apply styling is via external styling. This method references a file outside of the HTML document:
<head>
    <link rel="stylesheet" type="text/css" href="css/styles.css">
</head>
The above link tells the HTML document to pull in the file located at css/styles.css, which contains the styling information:
p {
  font-size: 16px;
   color: red;
}
This separation of HTML content and CSS styling promotes maintainability and reusability, much like how a well-organized house has distinct areas for different purposes.
Inheritance
At the core of CSS lies the concept of inheritance. It’s the mechanism that allows styles applied to parent elements to cascade down to their children. However, not everything inherits by default. For instance, form elements don’t inherit styles naturally. To overcome this, we can leverage the <body> or <html> elements as top-level objects to pass styles down to other elements.
Using font size as an easy to track item on a page, let’s set the size in pixels on the body element:
body {
    font-size: 22px;
    font-family: Arial, Helvetica, sans-serif;
    line-height: 1.5;
    background: papayawhip;
    color: rgb(0,0,0);
}
This results in this text on the page:
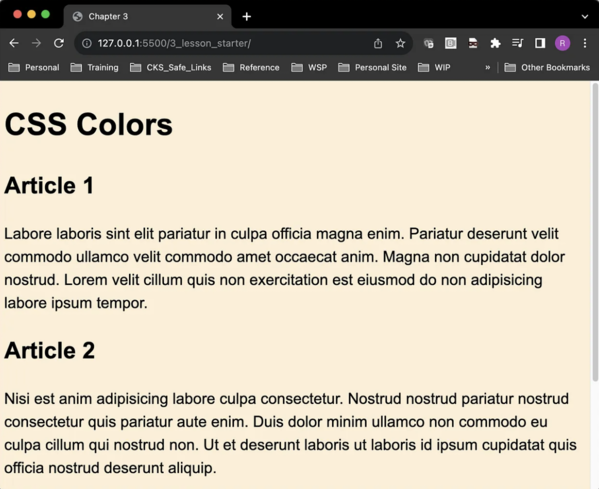
The CSS document does not have any styling for p elements, but there are two p elements visible on the page. Let’s adjust the font-size from 22px to 40px.
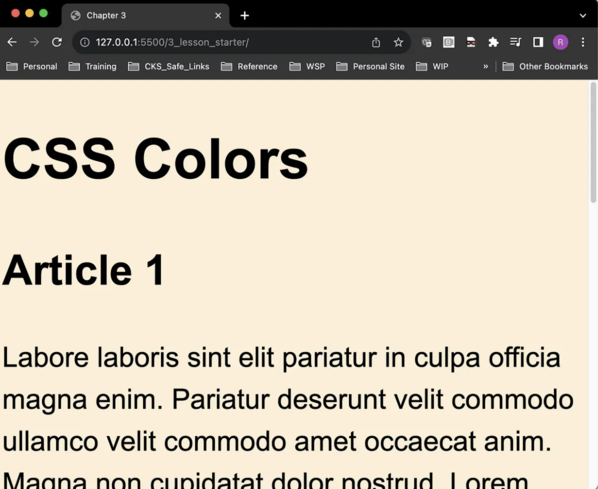
Wow, huge difference. This is inheritance in action. Even though the font-size is only applied to the body element, the p element inherits the value since it is embedded within the body element.
CSS specificity
CSS specificity is akin to a hierarchy of importance. It determines which styles take precedence when multiple rules clash. Here’s a quick rundown:
- Element Selector: The least specific selector affecting all elements of a certain type.
- Class Selector: More specific, targeting elements with a specific class attribute.
- ID Selector: The most specific, pinpointing a unique element by its ID.
When selectors collide, the most specific one wins. It’s like traffic rules — the higher the specificity, the more significant the rule. Let’s look at some examples.
<style>
    p {
        color: blue;
    }
    .highlight {
        color: red;
    }
</style>

<p class="highlight">This is a red paragraph.</p>
<p>This is a blue paragraph.</p>
The above example shows how a collision is handled between element and class selectors. The class selector is more specific so it will render the first paragraph red. A paragraph with no class attribute will be rendered as blue by the element selector.
<style>
    .highlight {
        color: red;
    }
    #unique {
        color: green;
    }
</style>

<p class="highlight">This is a red paragraph.</p>
<p id="unique">This is a green paragraph.</p>
The above example shows how a collision is handled between a class selector and an ID selector. ID selectors are more specific, which causes the second paragraph to be green while the first paragraph is red based on the class selector.
<style>
    .highlight {
        color: red;
    }
</style>

<p class="highlight" style="color: blue;">This is a blue paragraph.</p>
<p class="highlight">This is a red paragraph.</p>
The above example shows how a collision is handled between an ID selector and inline styling. Inline styling is the nuclear option when it comes to styling.
CSS specificity calculators are a thing that exists, which is neat. They do exactly what you would expect: provide a visual way to understand how CSS is being applied to a document. Here’s a handy one.
Colors
This section is going to work in VS Code because it provides a rich user experience in general when working with HTML and CSS, especially around colors.
If we create a style.css file and start marking it up, VS Code will immediately start trying to be helpful.
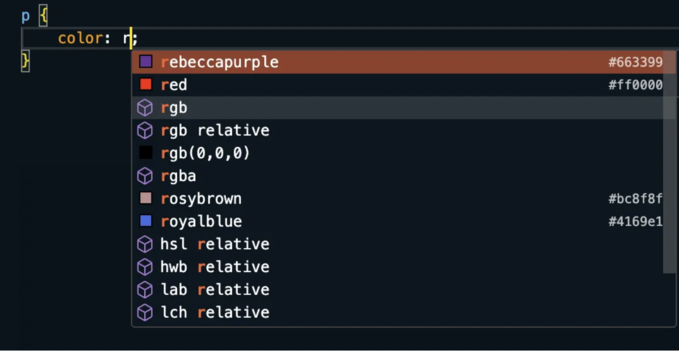
For the above, let’s say that we want red. Let’s take a look at the simple web page where this is being applied:
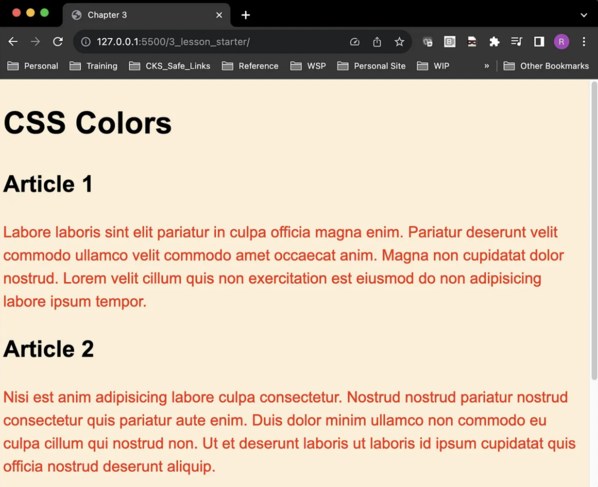
There are a couple of other ways that the color red could be set in this CSS file:
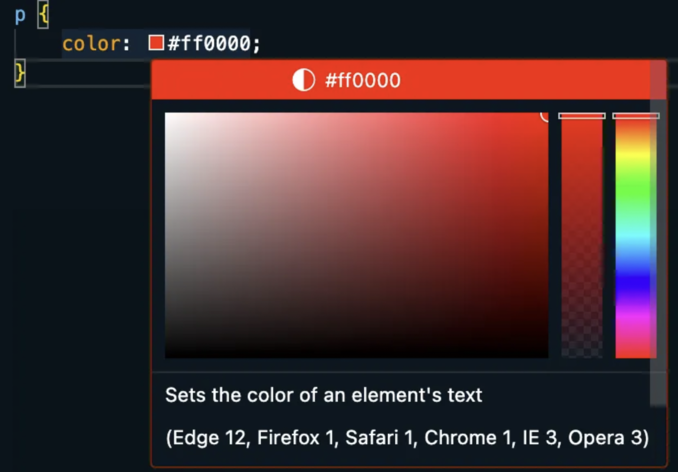
#ff0000(hex code)#f00(hex shorthand)rgb(255,0,0)(RGB notation)hsl(0, 100%, 50%)(HSL notation)
What’s nifty is that VS Code provides an easy way to switch between these functionally equivalent ways of expressing color. In VS Code, hover your mouse over the box denoting the color (the box to the left of ‘red’ in the below screenshot:
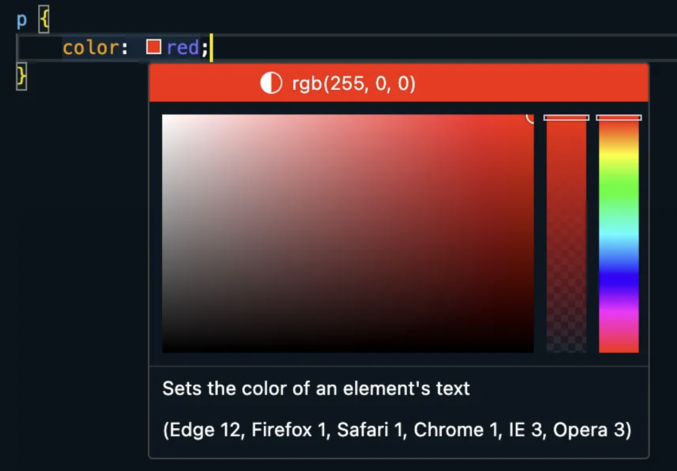
If the top pane of the pop up window is clicked, which is currently set to rgb(255,0,0) in the above screenshot, it will change to a different notation:
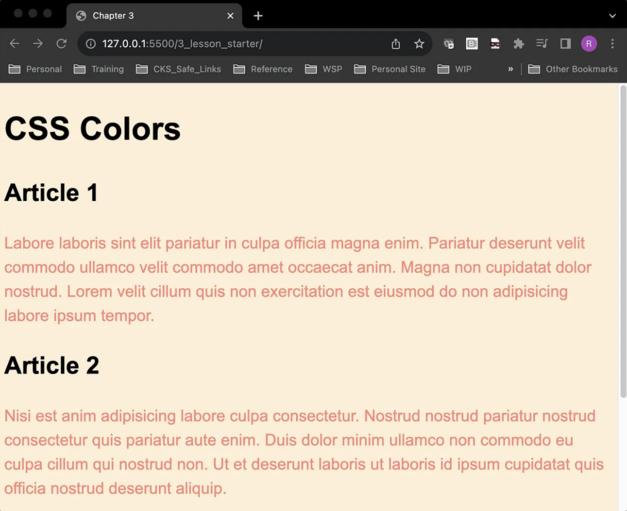
RGB and HSL also support transparency via an alpha channel. We’ll work through a quick example via RGB. Let’s say we wanted to make an element slightly transparent. Sticking with our red text, we would modify the CSS on the p element:
p {
    color: rgba(255,0,0,.50);
}
The fourth argument to RGBA represents transparency where 1 is no transparency, and 0 is complete transparency (invisible?). Below is a screen shot of the text rendered with the above CSS:
Wrap Up
CSS is a powerful tool that allows you to shape the visual identity of your web content. Understanding concepts like inheritance, specificity, and color management will give you a solid foundation to start your journey into the world of web design. As you practice and experiment, you’ll discover that CSS is both an art and a science, offering endless possibilities for creativity.